Everything You Need to Know About Self-Custodial Wallets
Custodial wallets on centralized exchanges (CEX) have long been regarded as a safe and convenient place to store assets. However, with the collapse of FTX, sentiments have changed and many users are now looking towards self-custodial wallets instead.
What are Self-Custodial Wallets and are they Secure?
A self-custodial wallet allows you to increase security and control of your funds by eliminating the third party and gain complete control over your assets. Unlike centralized exchanges, self-custodial wallet providers are not third parties that can access your funds. Even if they create the wallet, the private key is generated on your device and is only accessible by you.
Self-custodial wallets come in many forms - they can be browser-based, or as apps on mobile devices or desktops. Most self-custodial wallets such as Safe and Metamask come available on multiple platforms depending on your choice of device and browser. These wallets also provide more flexibility than what a centralized exchange would allow you to, such as connecting to decentralized applications (DApps) like decentralized exchanges (DEX) or NFT marketplaces.
Here is how you can create your Metamask account in 4 easy steps.
Step 1: Download and Install Metamask
Head over to MetaMask’s official website where it is available as an extension or an app based on the device or browser you are using.
If you prefer to use MetaMask on your mobile, we recommend setting up an account via a PC or Mac and then importing your account onto the Apple or Android app.
Step 2: Create an Account
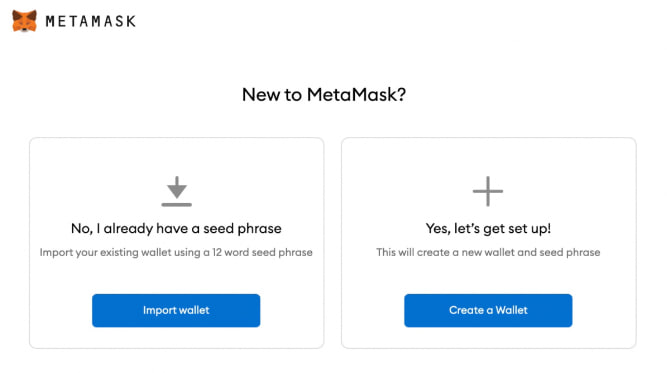
Once you’ve downloaded and installed the browser extension (in this example we are using Chrome), you will arrive at a selection screen.
For those setting up a software wallet for the first time, you will want to start with the “Create a Wallet” option.
Next, you will get a prompt to create a password that will be used to sign in to your MetaMask account.
You will then receive your seed phrase (secret backup phrase) which is a randomly generated string of words and will be asked to confirm the phrase by entering it back into the app. Once confirmed, your account will be created.
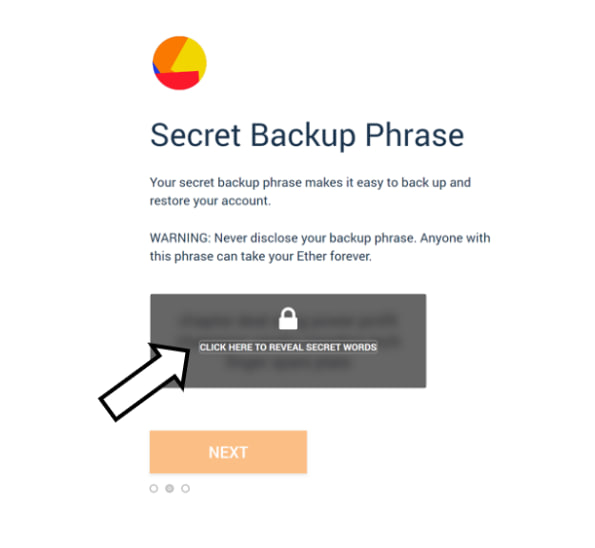
Important Note: Your seed phrase is a backup of your wallet. Anyone who knows your seed phrase will be able to access your wallet and therefore your funds. It is imperative that you store your seed phrase somewhere safe and offline.
Step 3: Add Funds
Before you purchase or receive a token in your wallet, make sure you click the “Add Token” button at the bottom of your main wallet page.
In order to send funds to your Metamask wallet, you will need your Public Wallet Address. Your wallet’s unique address can be found either directly below the “Account 1” identifier or via the account photo on the top right of the page under Account Details.
It is completely safe to give out your public wallet address, unlike your seed phrase, as no one can access your self-custodial wallet with your public address alone.
Step 4: Shifting to Mobile
To use your new wallet on your phone, you’ll need to download the MetaMask app through Apple’s App Store or the Google Play Store. Since you already have a Metamask wallet, make sure you select the “Import Using Seed Phrase” option and input the seed phrase you previously saved.
Hardware Wallets
For added security, some users choose to invest in a hardware wallet. It is a physical wallet and usually looks like a USB storage device with a screen and analog buttons. It is one of the safest methods to store your cryptocurrency due to its offline nature and the access to your coins is encrypted by the hardware device.
In addition, most hardware wallets are protected against unauthorized use with an extra PIN. If your hardware wallet gets stolen or lost, no one can access your coins without the PIN. With your seed phrase, you will be able to regenerate your crypto wallet even without physical access to your original hardware wallet.
As self-custodial wallets are commonly used to transact across DApps and smart contracts, a hardware wallet will ensure that you will be doing these things safely and securely. Here is how you can connect your MetaMask with a hardware wallet.
Step 1: Purchase a hardware wallet
As hardware wallets become increasingly popular, there are now many variations available on the market. It is highly recommended that users first check which hardware wallet is compatible with their self-custodial wallet, and to only purchase hardware wallets directly from the manufacturer.
MetaMask currently supports Trezor, Ledger, Lattice, Keystone, and AirGap Vault on Extension, and Mobile supports Keystone.
Step 2: Connect your hardware wallet
Once you have purchased your hardware wallet you will want to set it up and plug it to your computer device using a USB cable.
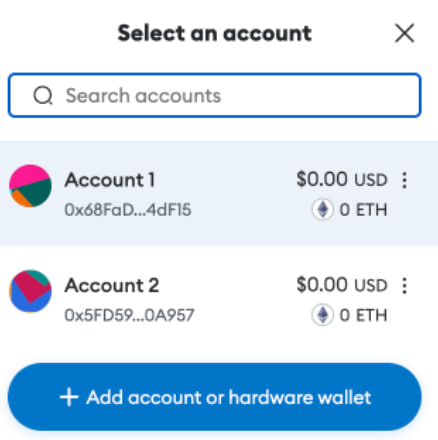
Click under the account it is currently on and select the “Add account or hardware wallet” option and select the “Add hardware wallet” option.
MetaMask will then proceed to prompt you to select a hardware wallet.
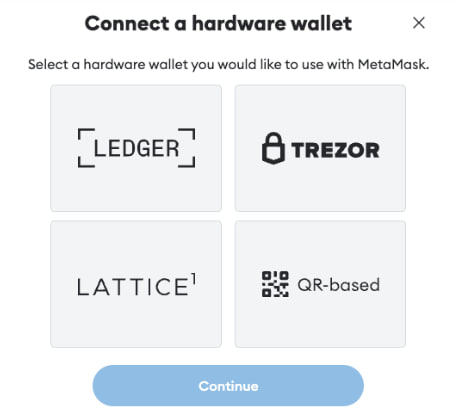
After selecting your hardware wallet, MetaMask will ask you to unlock it and open the ethereum app. This will allow Metamask to discover your wallet.
Step 3: Completion the connection
Once your wallet has been discovered, you will be shown a list of wallet addresses to choose from. Go ahead and select the correct address to unlock it, you will then have connected your hardware wallet to your MetaMask! If you have connected successfully, you will see an additional account in your MetaMask wallet.
_
Disclaimer: This article serves as an educational piece and the information provided is not intended to be personalised investment advice. Readers should always do their own due diligence before investing.